
MW WP Form, a Japanese-made plugin that has been popular for a long time on WordPress, will be discontinued. It's a bit disappointing, as it's a trusted plugin that has been adopted by many organizations and corporate websites.
Some customers cannot afford to develop a separate secure email form or implement a front-end solution using SaaS. One such customer requested that we switch their contact form to Google Forms. We decided to embed a Google Form while still utilizing the current design, and we did just that!
The know-how is available on various websites, so I had to check it out, but the setup itself was very simple. There were some parts that were a bit difficult, so I'd like to share those points with you today!
Operation Engineering
- Customize GoogleForms to a static page
- Transition to the submission completion page using JS after submitting the form
- Send automatic reply emails to customers who inquire using GAS
Stumbling points
- GAS for sending automatic reply emailsGetting form responses "namedValues" is undefined
- The sender address of the automated email is my own.
About Google Forms customization
You can not only install Google Forms as is, but also incorporate it into forms created with HTML/CSS and customize the design!
This is our visitor management sheet, and we have also incorporated Google Forms into the form section.
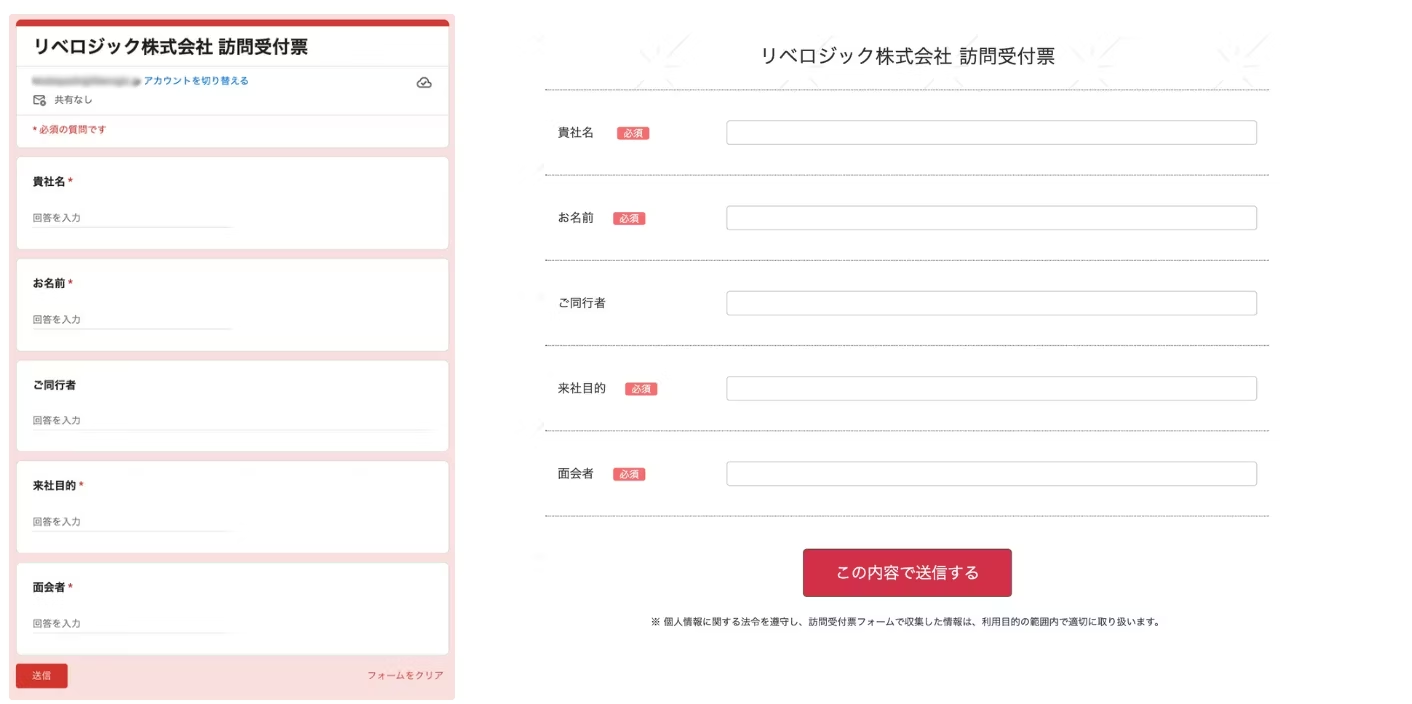
We will not go into details about customizing the HTML embedding or how to transition to the completion page after submission.
Stumbling point #1
GAS for sending automatic reply emailsGetting form responses "namedValues" is undefined
You can implement Google AppScript (GAS) to send automated emails from a spreadsheet linked to Google Forms responses.

When the submit button on the inquiry form is pressed, a script is run that reads the information sent from the linked spreadsheet and reflects it in the email.
function reply(e) {
  // フォームの回答を取得
  const name = e.namedValues['お名前'][0];
  const email = e.namedValues['メールアドレス'][0];


  // 自動返信メール件名
  const subject = '【テスト】お問い合わせありがとうございます';

  // 自動返信メール本文
  const body = name + '様\n' +
    '\n' +
    '下記の内容で申し込みを受付いたしました。\n' +
    '\n' +
    '【お名前】\n' +
    name + '\n' +
    '\n' +
    '【メールアドレス】\n' +
    email + '\n' ;

  // メール送信
  MailApp.sendEmail({
    to: email,
    subject: subject,
    body: body
  });
}
I thought I could send an email with this script, but I got an error.
TypeError: Cannot read properties of undefined (reading 'Your Name') at reply(reply:3:29)
The first item "Name" cannot be found.
Have you been able to obtain e? Check below
function reply(e) {
  Logger.log(JSON.stringify(e));
}
It returned null. Why?
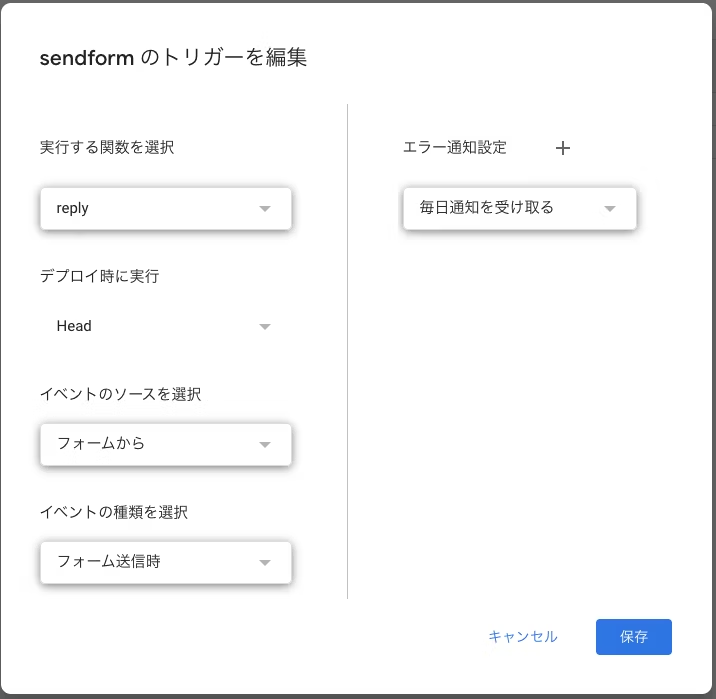
GAS event objectnamedValuesWhen I looked into it...
Note: Use this form submit trigger with SpreadsheetTriggerBuilder.
Apparently, only triggers for spreadsheets can be used here!responseUse.
function reply(e) {
  // フォームの回答を取得
  const responses = e.response.getItemResponses();
  let name = '';
  let email = '';

  // 回答をループして必要な項目を抽出
  responses.forEach(response => {
    const itemTitle = response.getItem().getTitle(); // 質問のタイトルを取得
    const answer = response.getResponse(); // 回答を取得

    if (itemTitle === 'お名前') {
      name = answer;
    } else if (itemTitle === 'メールアドレス') {
      email = answer;
    }
  });

  // 自動返信メール件名
  const subject = '【テスト】お問い合わせありがとうございます';

  // 自動返信メール本文
  const body = name + '様\\n' +
    '\\n' +
    '下記の内容で申し込みを受付いたしました。\\n' +
    '\\n' +
    '【お名前】\\n' +
    name + '\\n' +
    '\\n' +
    '【メールアドレス】\\n' +
    email + '\\n';

  // メール送信
  MailApp.sendEmail({
    to: email,
    subject: subject,
    body: body
  });
}
The argument e of this event is the trigger setting.GoogleFormsmosquitoSpreadsheetPlease note that the contents (properties and methods) will differ depending on which method you use.
- GoogleForms
e.response.getItemResponses() - Spreadsheet
e.values e.namedValues
The email arrived successfully with the rewritten script!
However, if you look closely, you'll see that the sender address is my own. If this continues, customers will receive automated emails from my address.
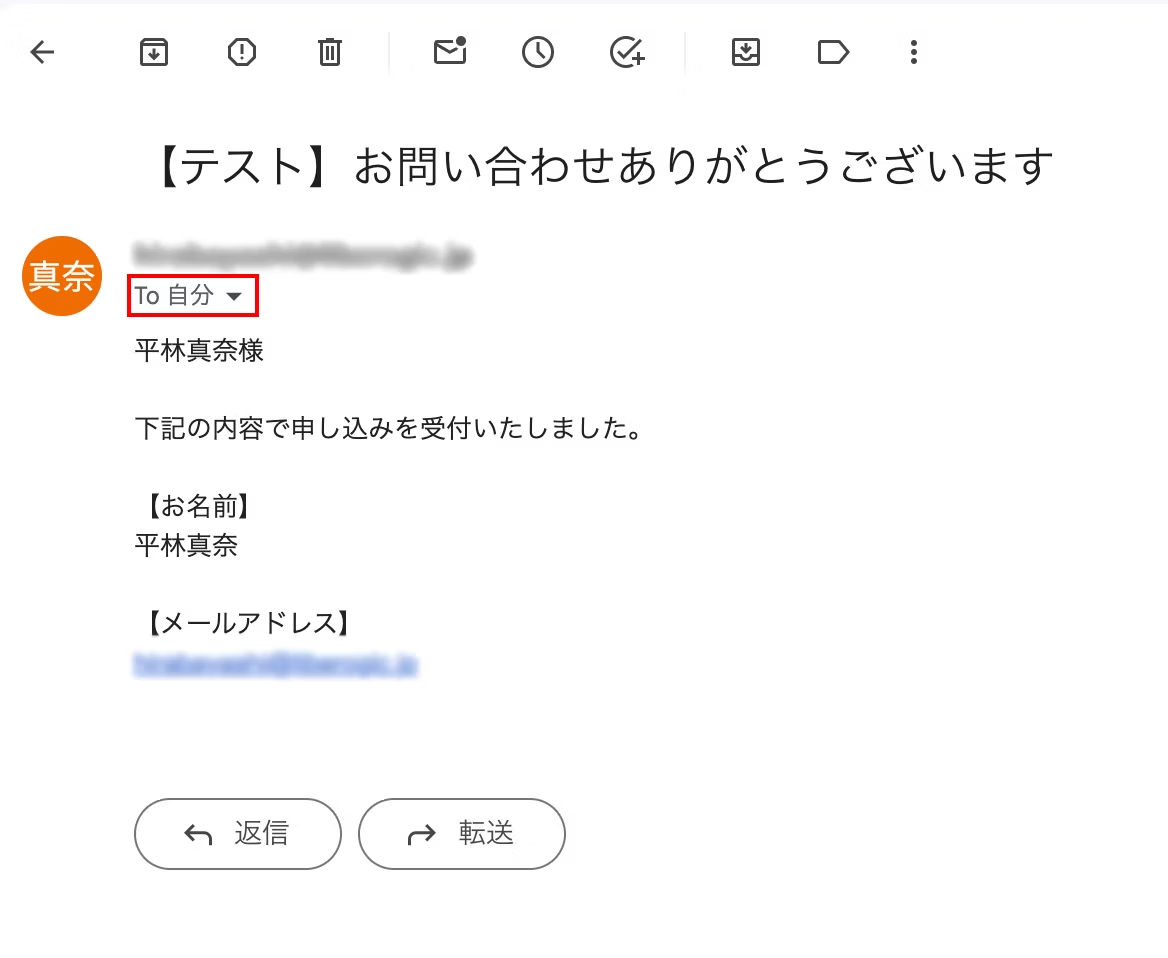
Stumbling point #2
The sender address of the automated email is my own.
- When using GAS, you must set "whose Google account it will run under."
- When sending an email from GAS, it will be sent from the "executor's Gmail"
This time, I implemented it by inviting my account to edit the Google Form.
Currently, the script executor for the automated email is set to me, so the email is sent from my address.
To make this the client's sender, you need to reconfigure it in the owner account. Also, "Client-side inquiry address"info@example.comIf you want to set "as the sender," how do you set it up?

Workaround
- The client's Gmail address will have an inquiry address
info@example.comHave them set an alias for this. - Reconfigure trigger settings in the owner account
- Add an email address with your own domain to your account、Script
MailApp.sendEmail()Add the optional from and write the address
GmailApp.sendEmail(email, replySubject, body, {
    from: 'info@example.com'  // 追加した送信元アドレス
  });
Adding your own domain addressWhat is
By adding an account,info@example.comYou can send it using the email address.
In other words, when sending from within Gmail,info@example.comYou can then select a sender name like "." It's like a subaddress.
If you do not add an account, as long as you are using a Gmail account,You cannot freely customize the sender。
In that case, you will need to use an external SMTP server (e.g. SendGrid, Amazon SES).
So the simplest and best way is to
For inquiries to the owner accountinfo@example.comHave the address added → Set up triggers in the owner account.
Please note that automatically sent emails will be sent as Gmail and will accumulate in the "Sent" folder.
*If you don't want your Sent folder to fill up, you may want to create a new account specifically for this purpose.
summary
Google Forms itself has a simple automatic sending function, but it is not possible to customize the subject or body of the email.
Other: If you use an extension, the free version has a daily limit of 20 automatic replies.
On the other hand, GAS allows you to build a highly flexible and scalable solution while keeping costs down!
Benefits of using GAS
- Easy-to-use email customization
- The content and recipient of the email can be automatically changed based on the answers provided in the form.
- You can also send emails designed in HTML format, which makes them look great.
- Can be linked with Google services
- Response data is automatically saved to Google Sheets for easy compilation and management.
- Automatically create events and set reminders in Google Calendar.
- Organize and store files in Google Drive for easy data management.
- No cost
- Available for free within Google Workspace.
- Since there is no need to use external services, it can be operated at low cost.
- Automatic and fast movement
- After completing the form, you can send an email or save the data immediately.
- It is also possible to execute multiple processes at once.
- Secure data management
- Since the processing is completed within your Google account, there is little risk of data leaking to the outside.
- Security is also solid, so you can rest assured.
- Flexible use
- You can easily reuse settings in new forms.
- By simply changing the code a little, you can add new features and customize it.
By using GAS,Flexible, scalable and cost-effectiveIt achieves this while operating safely within the Google ecosystem, making it a powerful option, especially when detailed processing and customization based on the responses is required.
This time, a confirmation screen was not included in the scope, so I didn't implement it, but I would like to try it next time if a request comes in. I will write another article about it as a memo when that happens!
If you have any problems with modifying or migrating your inquiry form, please contact us!
Reference site: Article by Zenn ryotoitoi:https://zenn.dev/ryotoitoi/articles/3cedb115d816e5

I develop front-end projects using JavaScript, React, and Next.js, focusing on markup. I feel happy when a site I've worked on is successfully published! My hobby is playing the guitar. I enjoy both writing and playing code!
Hiratchi
Front-end engineer / Joined in 2022